
Old Fashioned Fudge is a classic confection that harks back to a simpler time in the culinary world. This timeless sweet treat is renowned for its rich, creamy texture and deep chocolate flavor, evoking a sense of nostalgia. The process begins with the careful selection of high-quality ingredients – typically unsweetened chocolate, pure sugar, a touch of butter, and often a hint of vanilla extract for an aromatic depth. Milk is also a key component, providing the fudge with its signature creamy consistency.
The cooking process is an art in itself. Sugar, milk, and butter are combined in a heavy-bottomed saucepan, heated slowly while stirring constantly to ensure even melting and prevent burning. The mixture is brought to a gentle boil, then simmered until it reaches the ‘soft ball’ stage – a critical point in candy making where the sugar syrup, when dropped into cold water, forms a soft, pliable ball.
Once this stage is reached, the chocolate is stirred in until melted, creating a glossy, rich mixture. Vanilla extract is added at this point for flavor. The fudge is then removed from the heat and allowed to cool slightly before the stirring begins. This is where the magic happens: as the fudge cools and is stirred, it begins to thicken, transforming from a glossy liquid to a matte, spreadable consistency. The stirring is both science and art, requiring patience and timing; too little and the fudge will be too soft, too much, and it can become grainy.
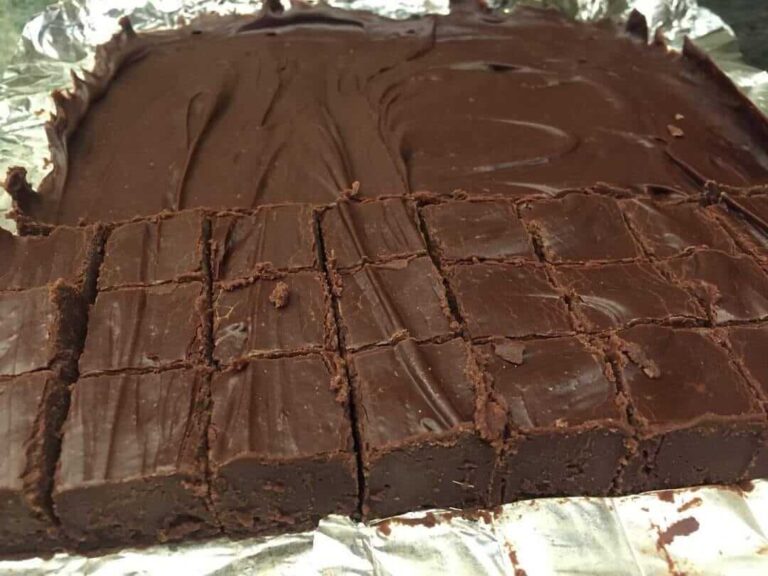
After achieving the perfect texture, the fudge is poured into a prepared pan, often lined with parchment paper for easy removal. It’s then left to set, which can take several hours. Once firm, it is cut into small, indulgent squares.
Eating Old Fashioned Fudge is a sensory experience. The first bite is a journey through textures – the initial firmness quickly giving way to a melt-in-your-mouth creaminess. The rich chocolate flavor, enhanced by the subtle undertones of vanilla and the luxurious mouthfeel of butter, makes it a deeply satisfying treat. It’s often enjoyed during the holidays, but its timeless appeal makes it a cherished treat year-round. This fudge is not just a candy, it’s a piece of culinary heritage, passed down through generations, and a testament to the art of traditional candy-making.
Ingredients
- Unsweetened chocolate – 2 ounces, finely chopped
- Pure granulated sugar – 1 1/2 cups
- Whole milk – 1/2 cup
- Unsalted butter – 2 tablespoons, plus extra for greasing
- Pure vanilla extract – 1 teaspoon
- A pinch of salt (optional)
Equipment
- Heavy-bottomed saucepan
- Candy thermometer
- Wooden spoon
- 8×8 inch baking pan
- Parchment paper or aluminum foil
Preparation
- Preparation of Pan: Line the 8×8 inch baking pan with parchment paper or aluminum foil, ensuring that it overhangs on the sides for easy fudge removal. Lightly butter the lining for extra non-stick assurance.
- Melting Chocolate: In a small bowl, finely chop the unsweetened chocolate to ensure even melting. Set aside.
Cooking Process
- Combining Ingredients: In the heavy-bottomed saucepan, combine the granulated sugar, milk, and butter. Place over medium heat.
- Melting and Stirring: Stir the mixture gently but constantly as the butter melts and the sugar dissolves. This prevents any sugar from sticking to the bottom and burning.
- Boiling: Increase the heat to bring the mixture to a boil. Once boiling, reduce the heat to maintain a steady but gentle boil. Do not stir during this stage.
- Monitoring Temperature: Insert the candy thermometer into the mixture. Cook until the temperature reaches the soft ball stage, typically around 234°F to 240°F (112°C to 116°C).
- Adding Chocolate: Once the soft ball stage is reached, remove the saucepan from the heat and add the chopped chocolate and vanilla extract. Do not stir; allow the residual heat to melt the chocolate.
- Cooling: Let the mixture cool down to about 110°F (43°C) without stirring. This cooling stage is crucial for the right texture.
- Stirring: Once cooled, use a wooden spoon to stir vigorously. The fudge will begin to thicken, lose its sheen, and become matte.
- Setting the Fudge: Quickly transfer the thickened fudge to the prepared pan. Smooth the top with a spatula or the back of the spoon.
- Cooling and Setting: Allow the fudge to cool at room temperature until set. This could take several hours.
- Cutting: Once set, use the overhanging parchment paper to lift the fudge out of the pan. Cut into small squares with a sharp knife.
Serving and Storage
- Serve at room temperature.
- Store in an airtight container, separating layers with parchment paper, in a cool, dry place.
Tips
- For a different flavor profile, try adding nuts or dried fruit to the fudge mixture before it sets.
- Ensure all ingredients are measured accurately for best results.
- Patience is key during the cooling and stirring stages for perfect texture.
Enjoy your delicious, homemade Old Fashioned Fudge, a treat that brings a touch of nostalgia with every bite!